GUI User Manual
Learn how to use the graphical user interface (GUI) for SOFA Robotics, designed to facilitate the programming and control of your robot simulations.
SOFA is an open-source framework designed for interactive mechanical simulations, with a strong focus on bio-mechanics and robotics. It provides advanced constitutive models and algorithms for efficiently computing both soft and rigid body dynamics. SOFA supports linear and non-linear elastic models, offers both explicit and implicit integration schemes, and includes traditional linear solvers. This powerful engine integrates numerous algorithms and models, making it highly suitable for complex simulation needs in bio-mechanics and robotics.
At Compliance Robotics, we have developed a dedicated graphical user interface (GUI) for SOFA, tailored specifically for robotics applications. This open-source software enables you to control and program your robot with ease.
GUI Overview
Simulation & Windows
The software consists of two main components: a 3D view of the simulation and a set of windows. In the 3D view, you can observe the simulated robot. The windows offer various functionalities, enabling you to program or directly control your robot.
Overview of the Windows
- Program: Create a program for your robot
- Move: Directly control your robot using sliders for the tool center point’s (TCP) target or motor adjustments.
- My Robot: View information about the robot and adjust settings.
- Plotting: Display simulation data in graphical form.
- Display Options: Customize the visual presentation of the simulation.
Overview of the Viewport
- 3D view of the simulated robot.
- Play/Pause/Step the simulation using the buttons at the top center of the 3D view.
- The TCP target is visualized as a frame (blue, red, and green).
- The Simulation State pane shows data like TCP position.
- Use the Driving Tab to choose which tab (window) controls the TCP target:
- Move (via sliders)
- Input/Output (beta: via an external software)
- Program (via way-points)
Controlling the Real Robot
The Simulation/Robot switch button toggles the connection between the simulation and the real robot. In Simulation mode, the robot remains stationary. It's advisable to use this mode to test your programs before operating the actual robot.


Light / Dark Mode
Switch the GUI between dark and light mode using the sun/moon button at the top right of the GUI.
Windows
Program Window
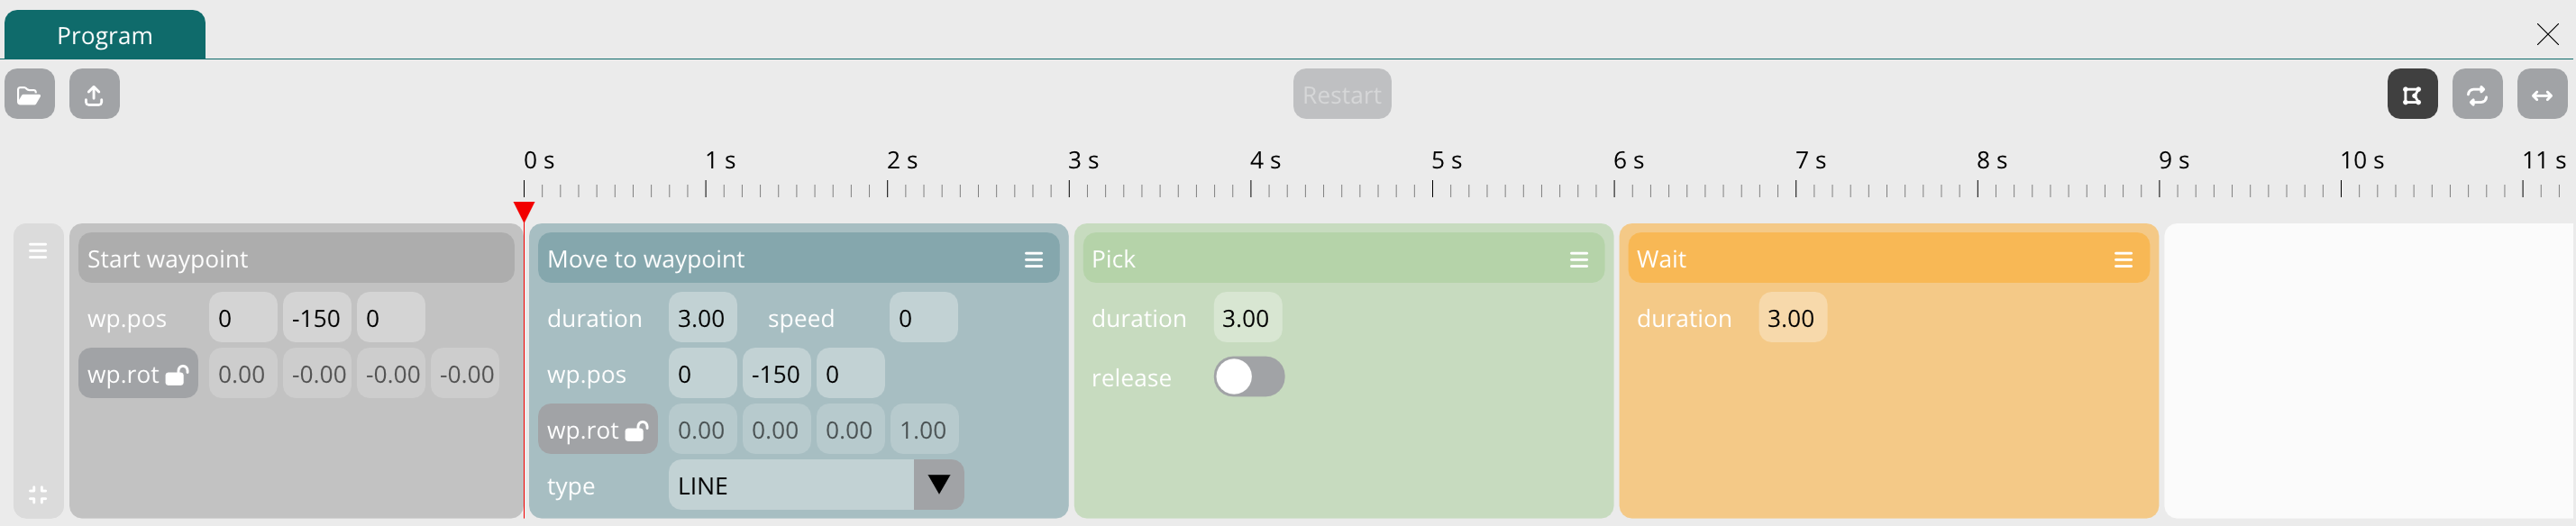
This window is used to program the robot. You can add action and modifier blocks to a track to compose your program:
- Action blocks:
- Move: Define a waypoint for the TCP target
- Pick: When equipped with a gripper, program the closing of the gripper
- Place: Program the opening of the gripper
- Wait: Add a pause to your program
- Modifier block:
- Repeat: Repeat a section of your program
If you use the Move Window to place the effector at a desired position and then add a Move Action Block to the track, it serves two purposes. First, it's an excellent way to test if the desired position is within the robot's working space. Second, this position will be used to initialize the Move Action Block.
You can always adjust the waypoint position directly on the block. Additionally, you can modify the duration of the motion or its speed.
The Program Window also has the following buttons (from left to right):
- Import: Import a program (.crprog file) to the software
- Export: Export a program
- Restart: Restart the program
- Draw the trajectory
- Repeat: Repeat the entire program from start to end
- Reverse: Loop the entire program, going forward and backward
When the Draw trajectory button is toggled, you can highlight the section of the trajectory corresponding to a specific Move Action Block by hovering over the block with your mouse.
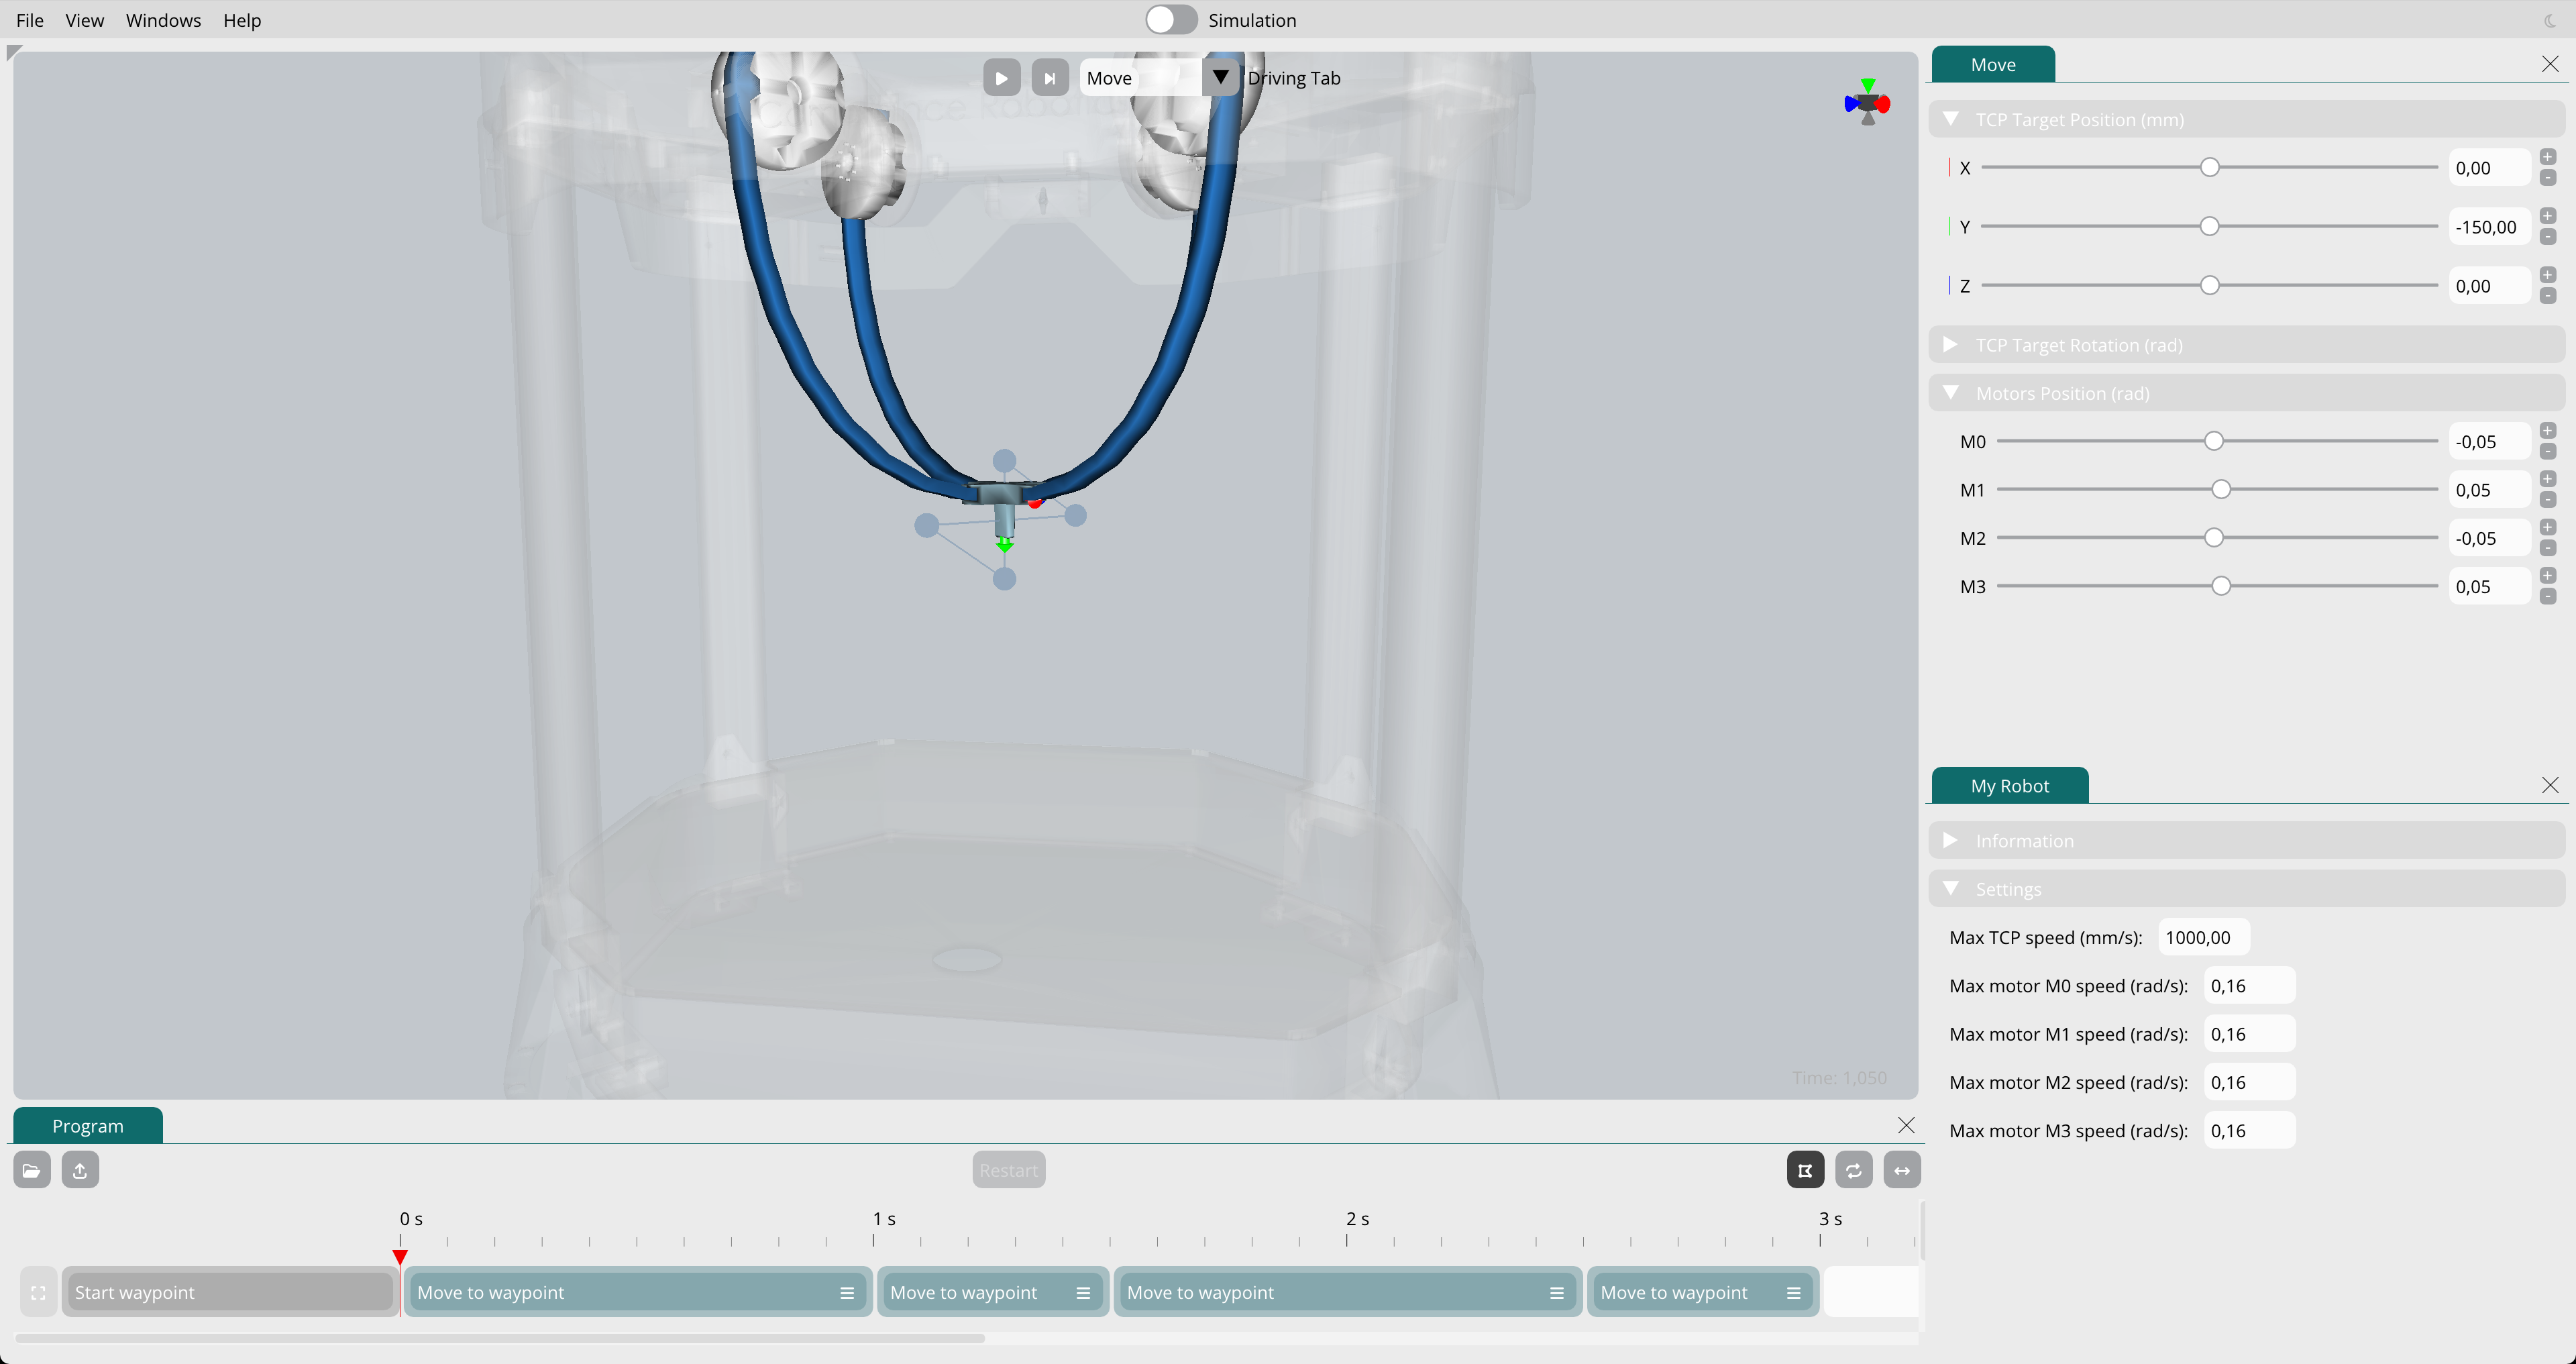
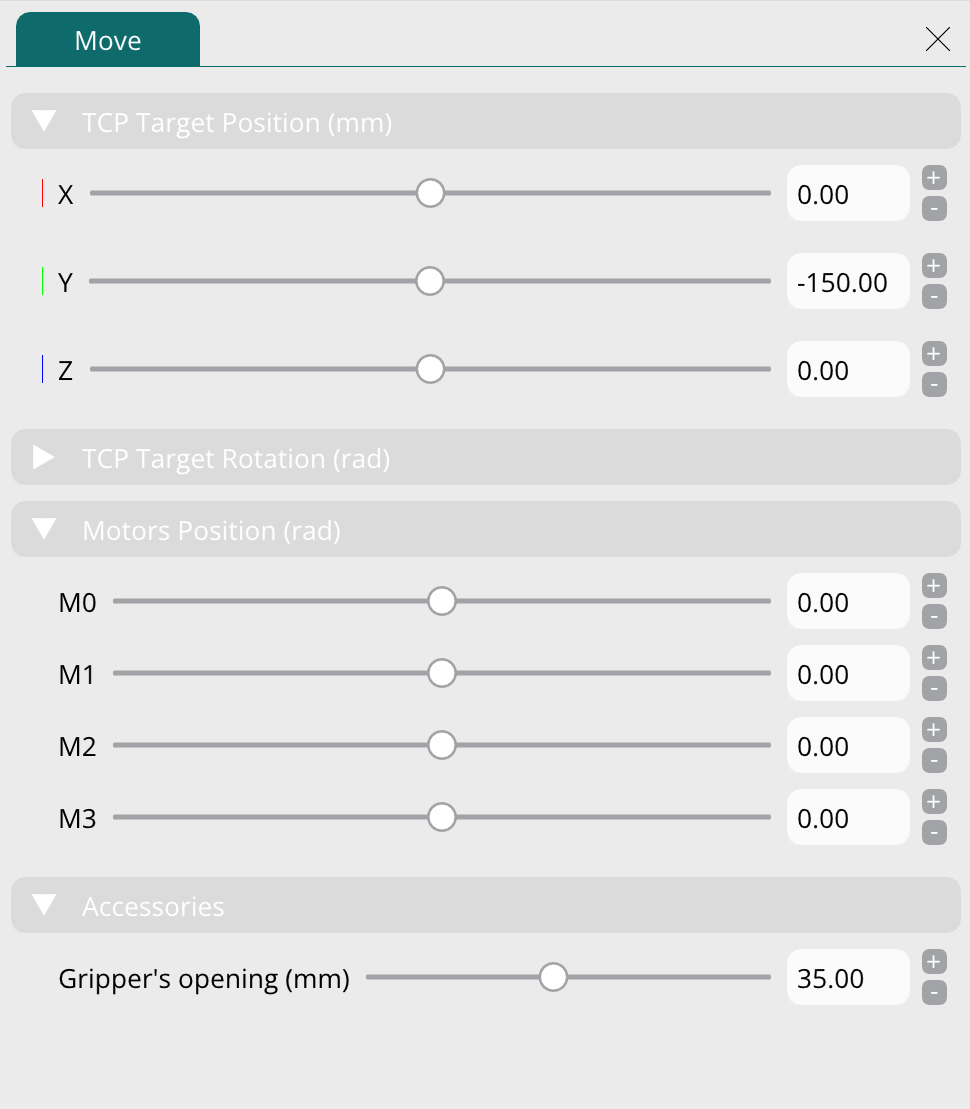
Move Window
The Move Window allows you to directly control your robot in real-time using sliders. There are typically two control modes available:
- Effector Control: Control the position and orientation of the robot's end-effector (TCP) using six sliders for X, Y, Z positions and Roll, Pitch, Yaw rotations.
- Motor Control: Directly control individual motor angles of the robot using dedicated sliders for each angle.
This window is particularly useful for:
- Exploring the workspace of the robot
- Testing specific positions that can be saved as waypoints in your program
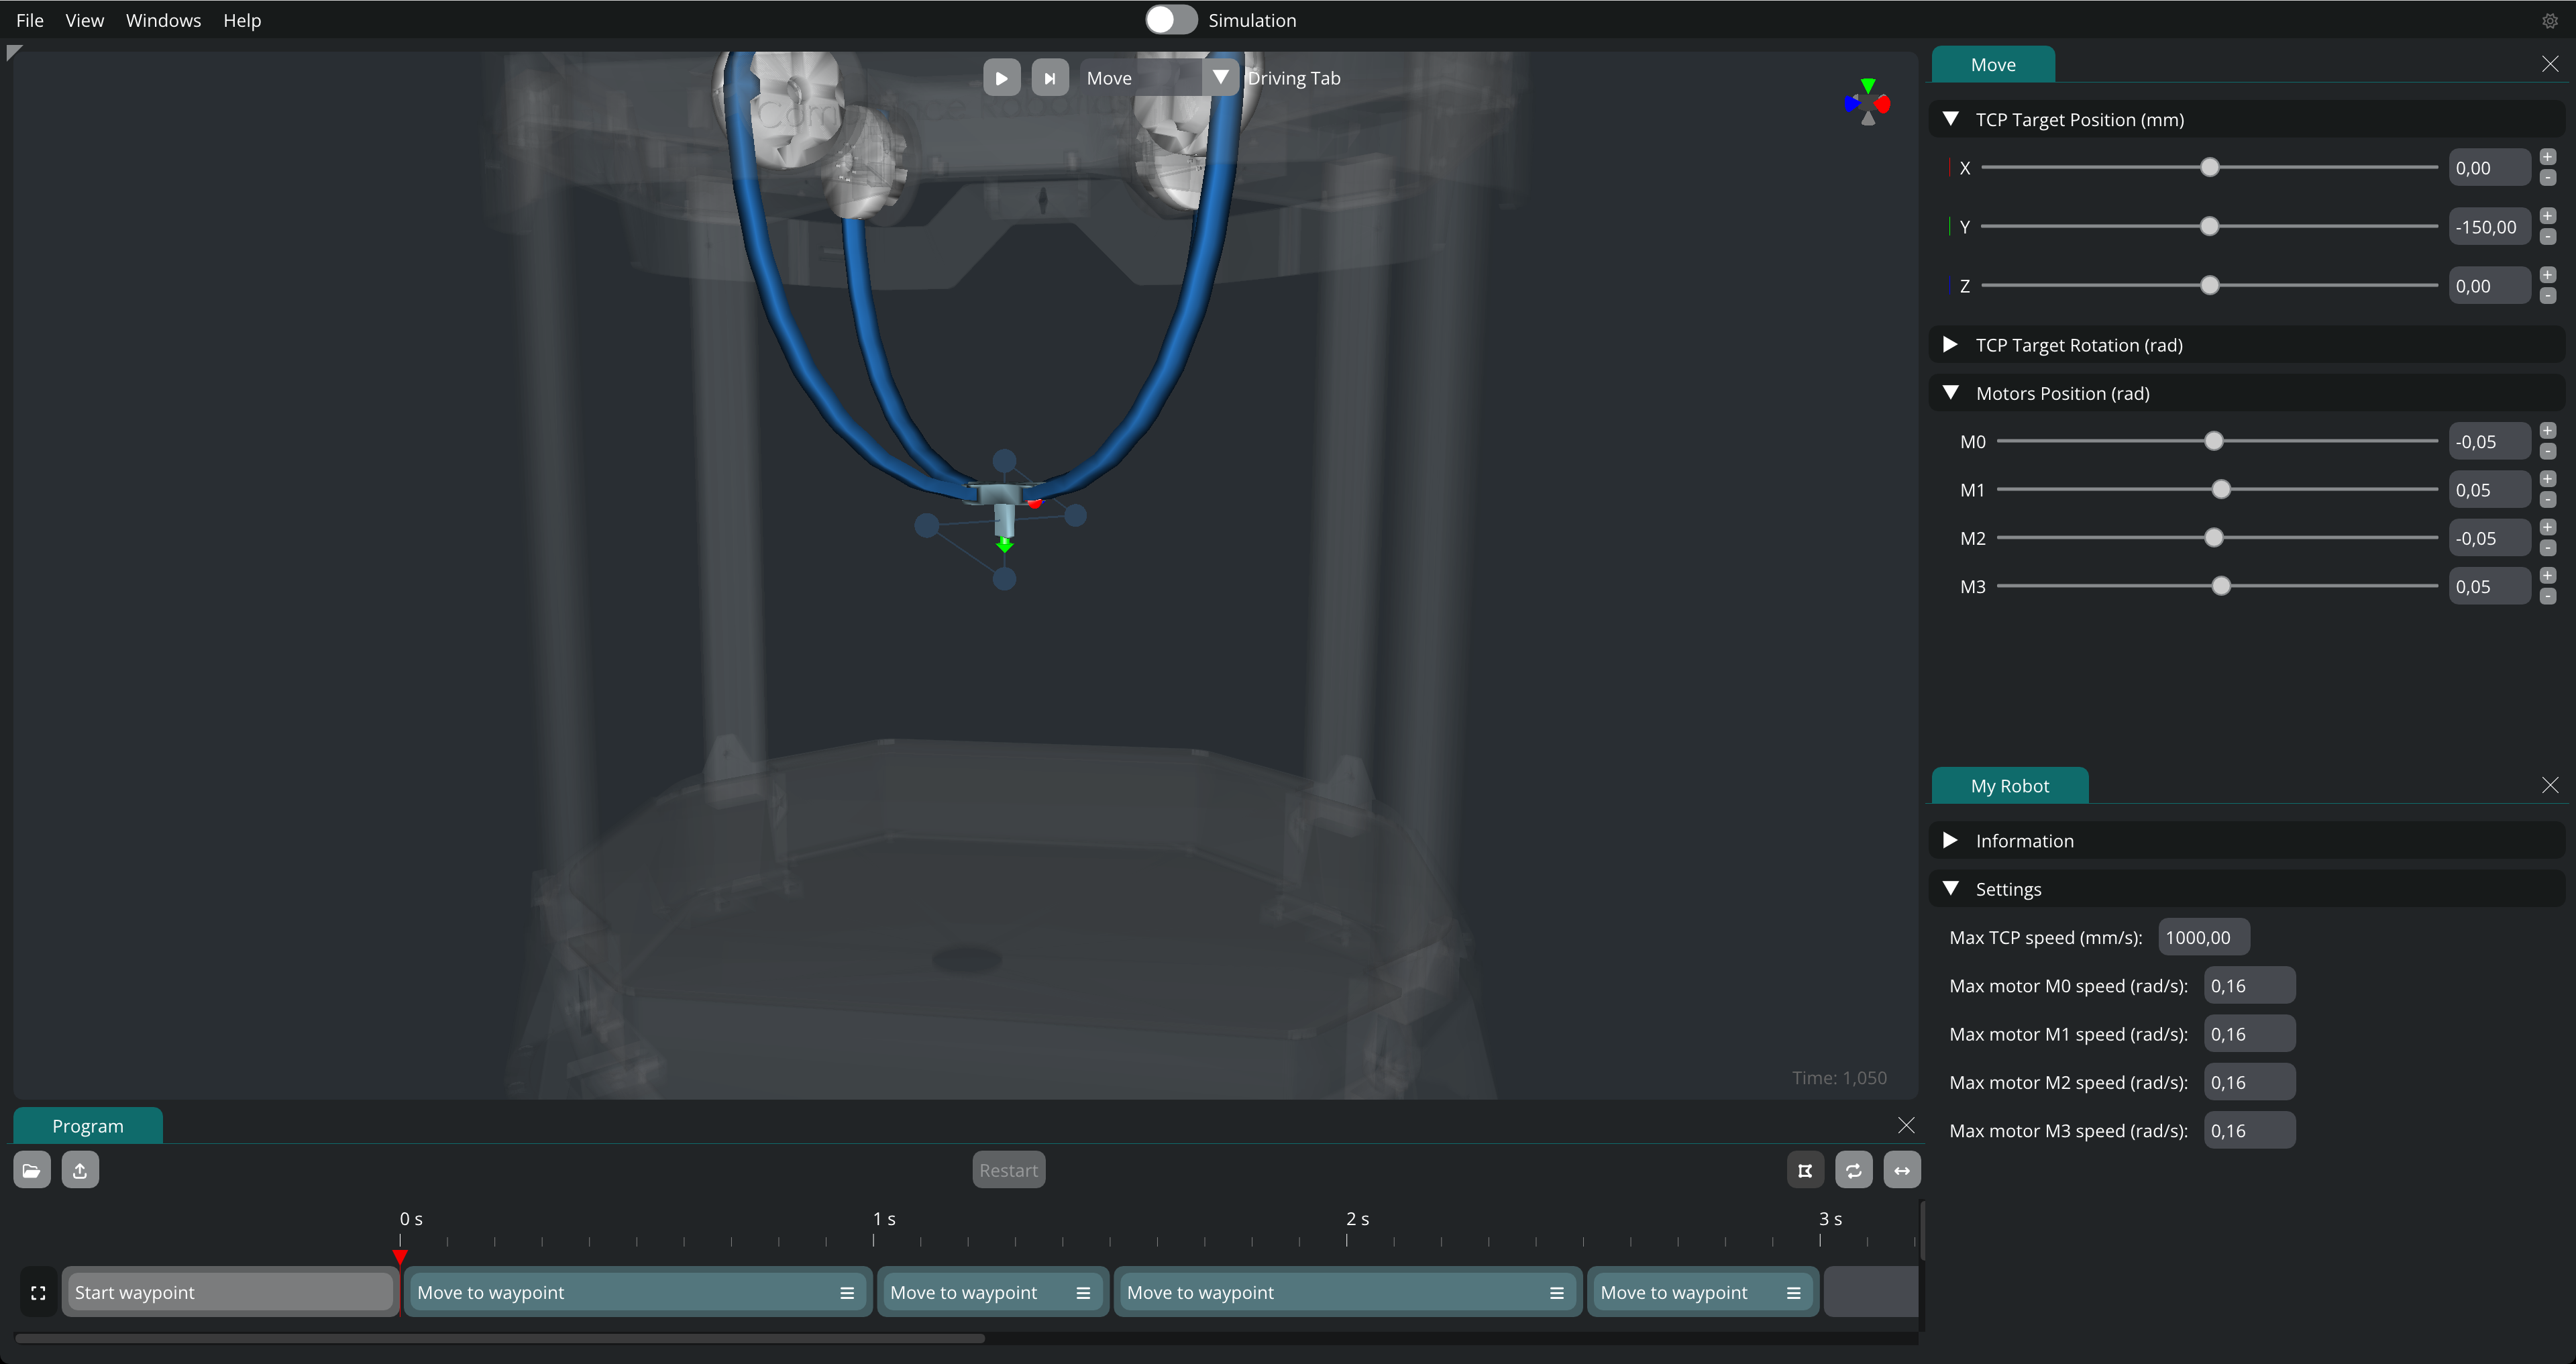
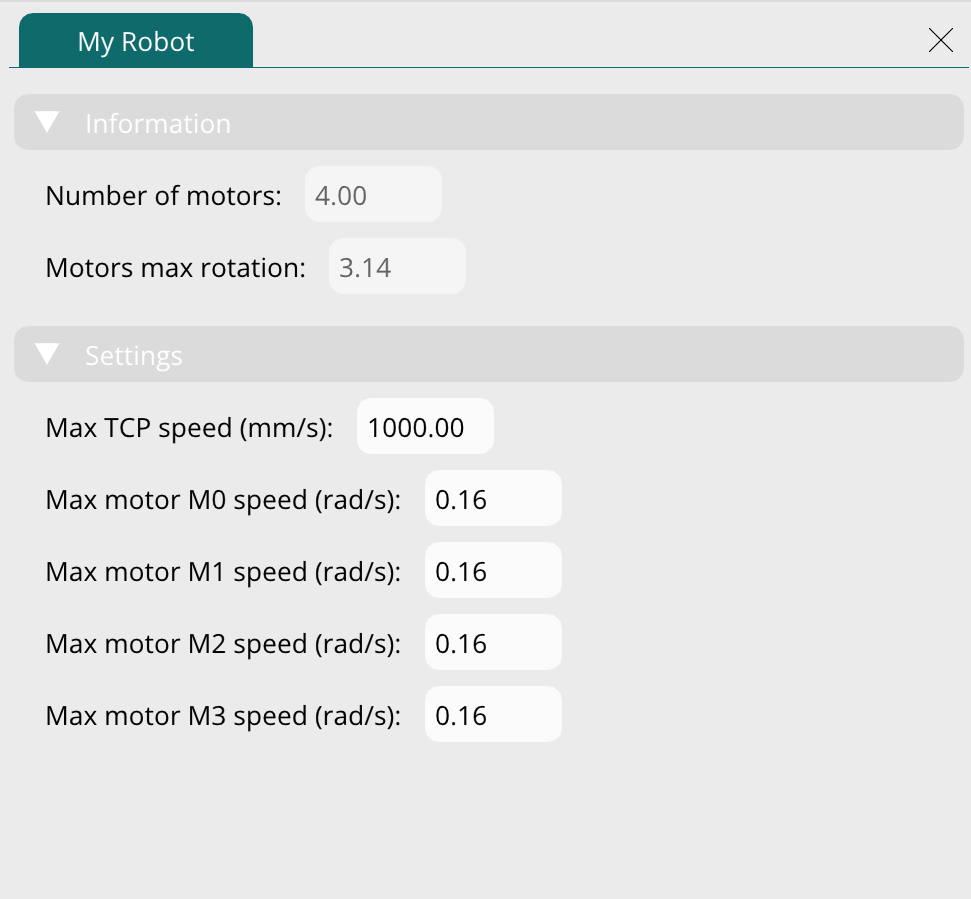
My Robot Window
The My Robot Window displays essential information about your robot and allows you to adjust various settings. Key features include:
- Robot Information: View technical specifications
- Settings Configuration: Adjust operational parameters such as maximum speed and acceleration
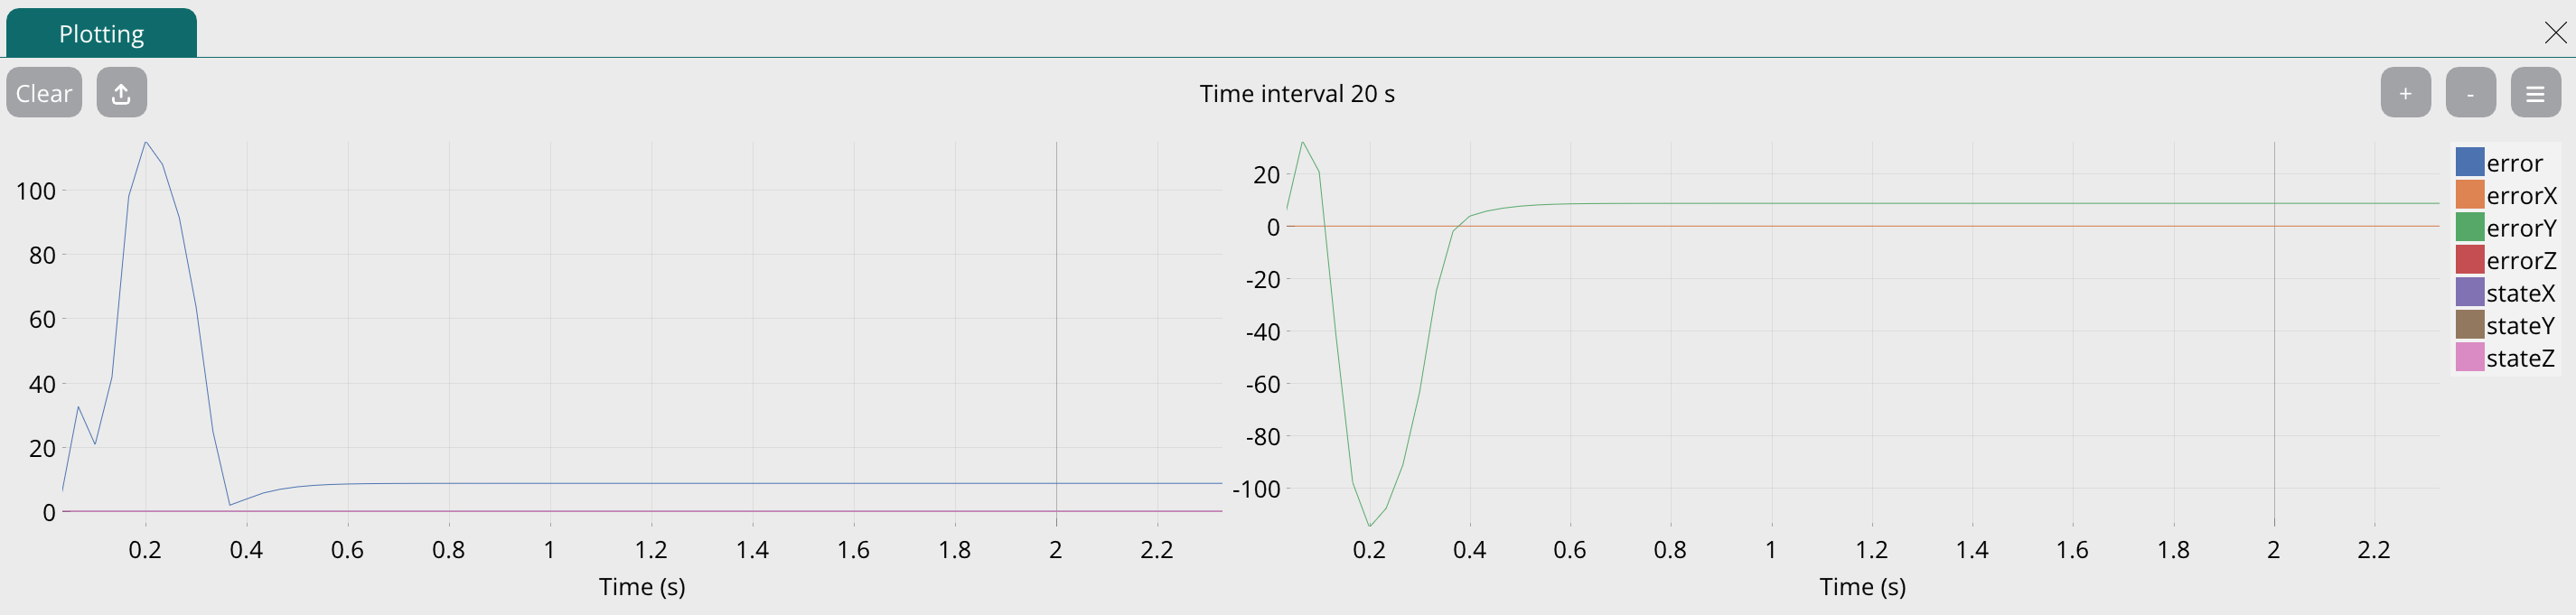
Plotting Window
The Plotting Window provides powerful data visualization capabilities for analyzing simulation data in real-time. Key features include:
- Real-time Plotting: View live data from the simulation as it runs
- Multiple Data Types: Plot various parameters including:
- Joint angles and velocities
- Forces and torques
- Customization Options: Adjust plot settings such as:
- Time window
- Axis ranges
- Data sampling rate
- Data Export: Save plot data for further analysis in external software
This tool is particularly useful for:
- Analyzing robot movement patterns
- Verifying program execution
- Debugging unexpected behavior