Create Your Own Lab
Learn how to create your own labs for the Emio Labs application.
Setup
Lab Architecture
For a quickstart, have a look at the Emio.lab_empty GitHub repository to see an example of a lab that you can use as a template to create your own lab.
The content of the Emio Labs application can be easily adjusted or completely changed. By following this documentation you’ll be able to modify the labs and create your own content.
A valid lab is a directory contianing:
- a main Markdown file that can include other markdown files
- a
lab.jsonfile containing metadata about the lab (e.g., its title)
The lab.json needs to provide:
- the name of the directory containing your
.mdfile - the filename of the
.mdfile (if different than the directory name) - a title and a description to display in the main Table of Contents
For example:
{
    "name": "mylab",
    "title": "My Lab",
    "description": "discover my lab",
    "url": "https://github.com/URL_TO_MY_LAB_REPOSITORY",
}
The lab directory usually contains at least one .py file, implementing a simulation scene for SOFA. This simulation will typically be launched when clicking the SOFA button ![]() in the exercise sections of the lab. These directories might also contain extra files needed for the lab, like parameters file or python scripts.
in the exercise sections of the lab. These directories might also contain extra files needed for the lab, like parameters file or python scripts.

Render my Lab Into Emio Labs
In order to see the lab into Emio Labs, it needs to be located in the directory path/to/home/emio-labs/VERSION/assets/labs/LAB_DIR_NAME. You can add a copy of your lab using the Lab Configurator. You will then be able to see how it renders in the app.
Add Python packages
If you want to install additional Python packages for your lab, follow the steps in this section.
Write Your Own Lab in Markdown
Markdown is a lightweight markup language with plain text formatting syntax. Its design allows it to be converted to many output formats. We use it to write our labs and the Markdown files are rendered by the application and displayed in a user-friendly way.
Here we describe the basic syntax of Markdown and the extended syntax that we use in the Emio Labs application.
The Emio.lab_empty lab gives a usage example of all the syntax explained below.
Basic Syntax
The basic syntax is the same as the CommonMark specifications. All markdown applications use this syntax.
| Element | Markdown Syntax |
|---|---|
| Heading | # H1 ## H2 ### H3 |
| Bold | **bold text** |
| Italic | *italicized text* |
| Block-quote | > block-quote |
| Ordered List | 1. First item 2. Second item 3. Third item |
| Unordered List | - First item - Second item - Third item |
| Code | `code` ```languageblock code ``` |
| Horizontal Rule | --- |
| Link | [title](https://www.example.com) |
| Image |  |
Extended Syntax
We also added extensions to the original Markdown to ease the making of labs.
These elements extend the basic syntax by adding additional features. It will only be understood by this application.
We use nested fenced block principle to define our custom blocks. A block fence is a sequence of at least three consecutive :. The content of the fenced block consists of all subsequent lines, until a closing block fence with at least as many : as the opening block fence.
If you want to nest multiple fenced blocks, the parent block fence should have more : than the children. For example :
:::: parent
::: child
MY_CONTENT
::: <-- end of child
:::: <-- end of parent
Quiz
You can create a quiz with open answer or a multiple choice question. For an open answer, create a block fence with the keyword quiz. Inside the quiz fence block, create another block fence with the keyword question, followed by your question (on the same line) and the answer on the next line, inside the block fence. For example :
:::: quiz
::: question What are the advantages of using beam models, compared to volume models?
Beam models simplify calculations compared to full three-dimensional models, reducing computation time and resources needed. They are widely used in many civil and mechanical engineering applications, facilitating the analysis and design of structures such as bridges and buildings. In our case, beam models are well-suited to predict the behavior of a continuum robot, especially when the model is used for control purposes.
:::
::::
This will give the following :


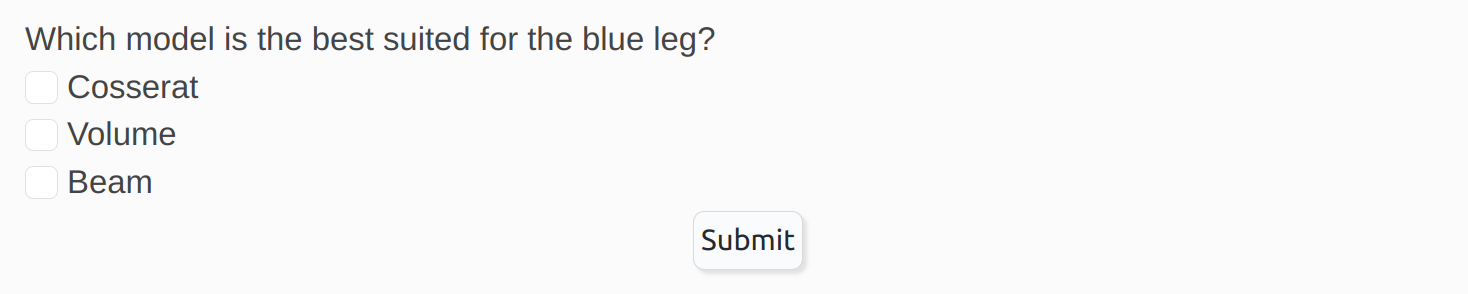
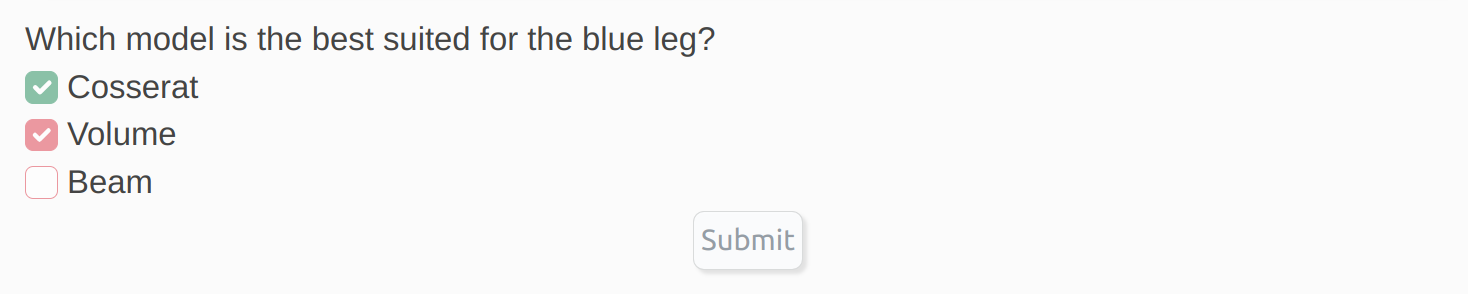
Submit button.For a question with multiple choices, create a block fence with the keyword quiz. Inside the quiz fence block, create another block fence with the keyword question, followed by your question (on the same line) and the list of possible answers in the next lines, inside the block fence. The good answers are set with [X] and the wrong answers with [] . For example :
:::: quiz
::: question Which model is the best suited for the blue leg?
- [X] Cosserat
- [ ] Volume
- [X] Beam
:::
::::
This will give the following :

Video
You can add videos by using the following container :
#main-video("PATH_OR_URL_TO_MY_VIDEO")
#video("PATH_OR_URL_TO_MY_VIDEO")
The main-video will move to the bottom right corner of the application when scrolling down. Only one main-video should be used in a lab (including main and other markdown files).
Highlighted block
You can highlight some text by using the following block fence with the keyword highlight :
::: highlight
MY_CONTENT
:::
Exercise Block
You can highlight your exercises by using the following block fence with the keyword exercise :
::: exercise
MY_EXERCISE_CONTENT
:::
Collapsible Block
Create collapsible section with the following block fence with the keyword collapse :
::: collapse MY_TITLE
MY_CONTENT
:::
Select Block
Create select content with the following block fence with the keyword select.
Inside the select block, you can define options with the keyword option followed by the value for the option. Each option should have a unique value.
You can optionally add a label to the option by using the syntax [MY_LABEL]For example:
:::: select MY_UNIQUE_SELECT_NAME
::: option MY_OPTION_VALUE_1 [MY_LABEL_1]
::: option MY_OPTION_VALUE_2
::: option MY_OPTION_VALUE_3 [MY_LABEL_3]
::::
You may have as many options as you want.
Text Input
You can add an text input field with:
#input("MY_UNIQUE_INPUT_NAME", "MY_OPTIONAL_PLACEHOLDER", "MY_OPTIONAL_DEFAULT_VALUE")
For example:
#input("customleg") // no placeholder and no default value
#input("customleg", "leg name") // with placeholder
#input("customleg", "leg name", "blueleg") // with placeholder and default value
#input("customleg", "", "blueleg") // no placeholder and default value

Buttons
There are three types of buttons available :
- The SOFA button will launch a SOFA simulation with the specified scene file
MY_SCENE.py. You can pass as many arguments as you want to the scene file:#runsofa-button("assets/labs/<LAB_NAME>/MY_SCENE.py", "MY_ARGUMENT_1", "MY_ARGUMENT_2") - The Python button will run a python script
MY_SCRIPT.py. You can optionally provide a path to additional python modules that will be added to thePYTHONPATHbefore running the script.You can use this button to install extra Python packages with:#python-button("'assets/labs/<LAB_NAME>/MY_SCRIPT.py' arg1 'example/path/as/arg2'", "OPTIONAL_PATH_TO_PYTHON_MODULES")#python-button("-m pip install --target 'assets/labs/<LAB_NAME>/modules/site-packages' -r 'assets/labs/<LAB_NAME>/requirements.txt'") - The Open button will open a file
MY_FILEwith the default application associated with the file type on your system.#open-button("assets/labs/<LAB_NAME>/MY_FILE")
An argument can be a value of a select block or an input field, by using its unique name that you defined. For example:
#runsofa-button("MY_SCENE.py", "MY_UNIQUE_SELECT_OR_INPUT_NAME", "MY_ARGUMENT_2")
Icons
We use the icon library font awesome. You can browse and copy the name of a free icon to put into the Markdown command:
#icon("ICON_NAME")
For example:
#icon("warning") <-- will display a warning icon
Share Your Labs
We can help you design and share your own labs with the community. Just send us an email at this address contact@compliance-robotics.com, explaining us your project and your needs.